
S646se - Full LITHIUM Pack Project - First Attempt
Re: S646se - Full Pack Project - First Attempt
![]() by Burgerman » 07 Apr 2016, 00:16
by Burgerman » 07 Apr 2016, 00:16
It has a way of telling you if you are wrong.
-

Burgerman - Site Admin
- Posts: 71087
- Joined: 27 May 2008, 21:24
- Location: United Kingdom
Re: S646se - Full Pack Project - First Attempt
![]() by expresso » 07 Apr 2016, 00:20
by expresso » 07 Apr 2016, 00:20
yes will the the 7th row tomorrow and send pic with buss bars connected to it -
i think i follow you - but i will take pics of the places where i will connect them anyway to be sure
i will connect them and not locktite them on the top when i get there - post the pics first before i lock it down
i would not want more than 3 things on any one screw - i may have to put the balance wire on the 3rd screw down roll 0 and 8 - the 2nd screw has two buss already and can add just the charge leads there - - making it 3 things -
the front screws would have the 7th roll of cells - which gives me 3 items on the screws also for the ends 0 and 8
will take pics first also -
thanks
Quickie 636 - 230ah LifePo4
- expresso
- Posts: 11985
- Joined: 10 May 2010, 03:17
Re: S646se - Full Pack Project - First Attempt
![]() by expresso » 07 Apr 2016, 00:21
by expresso » 07 Apr 2016, 00:21
Burgerman wrote:It has a way of telling you if you are wrong.
I rather scollard tell me its wrong before that happens
Quickie 636 - 230ah LifePo4
- expresso
- Posts: 11985
- Joined: 10 May 2010, 03:17
Re: S646se - Full Pack Project - First Attempt
![]() by Burgerman » 07 Apr 2016, 00:41
by Burgerman » 07 Apr 2016, 00:41
the front screws would have the 7th roll of cells
Rolls...
-
Burgerman - Site Admin
- Posts: 71087
- Joined: 27 May 2008, 21:24
- Location: United Kingdom
Re: S646se - Full Pack Project - First Attempt
![]() by expresso » 07 Apr 2016, 00:50
by expresso » 07 Apr 2016, 00:50
yeah i keep typing that wrong - Rows
Quickie 636 - 230ah LifePo4
- expresso
- Posts: 11985
- Joined: 10 May 2010, 03:17
Re: S646se - Full Pack Project - First Attempt
![]() by Burgerman » 07 Apr 2016, 01:17
by Burgerman » 07 Apr 2016, 01:17
Think. That top set, is just another bunch of cells in parallel. You just connect all the pos or negs to all the rest.
8 times. You are using cables instead of bus bars. Thats it.
------- AND -
+++++ AND +
------- AND -
+++++ AND +
------- AND -
+++++ AND +
------- AND -
+++++ AND +
------- AND -
+++++ AND +
------- AND -
+++++ AND +
------- AND -
+++++ AND +
------- AND -
+++++ AND +
I Hope all these download/file.php?id=4799&mode=view are soldered...
-
Burgerman - Site Admin
- Posts: 71087
- Joined: 27 May 2008, 21:24
- Location: United Kingdom
Re: S646se - Full Pack Project - First Attempt
![]() by expresso » 07 Apr 2016, 02:00
by expresso » 07 Apr 2016, 02:00
actually there are not soldered - i crimped them and heatshrink - those are marine rings with 3m adhesive lined
is that not good enough ?
is that not good enough ?
Quickie 636 - 230ah LifePo4
- expresso
- Posts: 11985
- Joined: 10 May 2010, 03:17
Re: S646se - Full Pack Project - First Attempt
![]() by Scollard » 07 Apr 2016, 03:26
by Scollard » 07 Apr 2016, 03:26
They will be just fine when crimped properly. If you crimp and can't pull them apart they are OK.
- Scollard
- Posts: 258
- Joined: 29 Aug 2015, 01:43
- Location: Seattle, WA
Re: S646se - Full Pack Project - First Attempt
![]() by Scollard » 07 Apr 2016, 03:36
by Scollard » 07 Apr 2016, 03:36
expresso wrote:yes will the the 7th row tomorrow and send pic with buss bars connected to it -
i think i follow you - but i will take pics of the places where i will connect them anyway to be sure
i will connect them and not locktite them on the top when i get there - post the pics first before i lock it down
i would not want more than 3 things on any one screw - i may have to put the balance wire on the 3rd screw down roll 0 and 8 - the 2nd screw has two buss already and can add just the charge leads there - - making it 3 things -
the front screws would have the 7th roll of cells - which gives me 3 items on the screws also for the ends 0 and 8
will take pics first also -
thanks
I thought the 7th row would connect to the 2nd screw in leaving that first screw for the busbar + 2 terminals.
The short wire doesn't necessarily have to go forward of the 7th row. You could always bend it under the 7th row. You just have to screw it down to the top of the big pack first, lay down rubber divider, put the 7th row on top, and then attach the short wires to the top of the 7th row.
- Scollard
- Posts: 258
- Joined: 29 Aug 2015, 01:43
- Location: Seattle, WA
Re: S646se - Full Pack Project - First Attempt
![]() by expresso » 07 Apr 2016, 03:58
by expresso » 07 Apr 2016, 03:58
yes that sounds better - the 7th row using the other screw which has a double buss on it already - so just one extra connection to it - i will do that - the whole top row going to the 2nd screw - under the Cells -
the front screws - i can attach the main chair leads - the charge leads and balance wires - all along the front first screws -
the front ends would have 4 connected to it - chair lead - charge lead and balance ring - with the buss -
i can test it and put the screw in 4 of the rings to see if it clears it enough to screw down good - ?
or else i have to go back more to the 3rd screw down the line for one of the connections - charge leads only on the 3rd screw down
2nd screw would be the top row only -
1 screw main chair and balance only ? the lugs i use are a bit thicker than the other ring connectors - not sure if adding 2 of them on the same screw with balance and buss - may be too much ?
Quickie 636 - 230ah LifePo4
- expresso
- Posts: 11985
- Joined: 10 May 2010, 03:17
Re: S646se - Full Pack Project - First Attempt
![]() by Scollard » 07 Apr 2016, 05:04
by Scollard » 07 Apr 2016, 05:04
Well as you have pointed out there are a lot of combinations. You just have to figure out which one works best for your situation.
- Scollard
- Posts: 258
- Joined: 29 Aug 2015, 01:43
- Location: Seattle, WA
Re: S646se - Full Pack Project - First Attempt
![]() by Burgerman » 07 Apr 2016, 09:30
by Burgerman » 07 Apr 2016, 09:30
Crimps, thin metal, unsoldered. And 32 of them... Personally I would solder. Dont trust weak crimps. Easy to do afterwards.
-
Burgerman - Site Admin
- Posts: 71087
- Joined: 27 May 2008, 21:24
- Location: United Kingdom
Re: S646se - Full Pack Project - First Attempt
![]() by LROBBINS » 07 Apr 2016, 11:06
by LROBBINS » 07 Apr 2016, 11:06
One can solder after crimp even with heat shrink or insulated terminals without damaging the insulation. Use a little flux before crimping. Apply the heat to the bare part of the ring terminal near to, but not touching, the insulated barrel, and touch thin solder to the barrel opening near the iron. Solder doesn't need to fill the whole barrel, just flow into the open end. The "rule" in aviation is to do both if you don't have single-purpose crimper and go-no-go gauges for your terminal - crimp for mechanical support and solder to insure conductivity. Soldering without or before crimping can give solder flow back into the unsupported wire, which makes it brittle. NASA probably has its own procedures for space-vehicle wiring, but those can be a bit much - for example, they don't permit plastic tie wraps, but require old fashioned lacing to a very detailed spec. Ciao, Lenny
- LROBBINS
- Posts: 5807
- Joined: 27 Aug 2010, 09:36
- Location: Siena, Italy
Re: S646se - Full Pack Project - First Attempt
![]() by Burgerman » 07 Apr 2016, 11:10
by Burgerman » 07 Apr 2016, 11:10
You can get away with a bit of flux on the solder and do it from the terminal ring end afterwards most likely. If it runs into the wire its done. Without taking anything apart. Solder quick, cool with wet cloth or sponge.
-
Burgerman - Site Admin
- Posts: 71087
- Joined: 27 May 2008, 21:24
- Location: United Kingdom
Re: S646se - Full Pack Project - First Attempt
![]() by expresso » 07 Apr 2016, 14:50
by expresso » 07 Apr 2016, 14:50
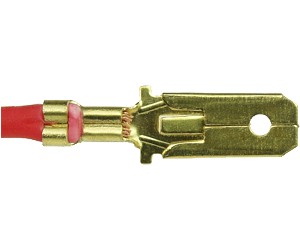
you know - since i didnt install anything yet - i can just redo those 4 wires - since i have all the other items anyway - but a good crimp with those marine rings heatshrinked etc, - its more then strong enough for this purpose -
i am willing to redo them since i didnt install them - but if there were installed and in the tray in the chair etc, - i wouldnt redo that - because i did test it - i pulled a few times - but also has a few others much stronger then me to give it a pull test -
it was pulled on before i heatshrinked it - and then after - it wont be coming off on its own thats for sure - unless it gets hooked on something and then extreme force pulling it apart - - which i dont see that happening once all done in the chair -
just to put my mind at ease a bit more since i am new to crimping also - i actually dont use the crimper - i try to hold the wire in there for the girl to crimp - i will try to adjust the crimper to make it bit tighter if i could - i left the way it arrived -
i think theres a little screw to remove - and turn it to ether plus or minus - then screw it down - i am going to guess that i need to turn it to the plus side a notch more to make it tighter -
i really dont see any way i can solder after i crimped and heatshrinked it - impossible that i can see - these marine grade 3m heatshrink rings were made for crimping and heat it down - its glued - solid - i bet even if its not crimped perfect - but heatshrinked tight - it wont even move then - but i am not going to test that with my pack
Quickie 636 - 230ah LifePo4
- expresso
- Posts: 11985
- Joined: 10 May 2010, 03:17
Re: S646se - Full Pack Project - First Attempt
![]() by shirley_hkg » 07 Apr 2016, 15:17
by shirley_hkg » 07 Apr 2016, 15:17
It is really unnecessary to redo the wires. They are for the add-on only, after all.
Just cut the excess shrink tube at the ring end to expose the wires. Sand paper the spot lightly. Apply solder there and lead will flow into the terminal , with a bit of flux and 380 degree C
Just cut the excess shrink tube at the ring end to expose the wires. Sand paper the spot lightly. Apply solder there and lead will flow into the terminal , with a bit of flux and 380 degree C
- shirley_hkg
- Posts: 4655
- Joined: 31 Dec 2010, 13:42
Re: S646se - Full Pack Project - First Attempt
![]() by Scollard » 07 Apr 2016, 18:41
by Scollard » 07 Apr 2016, 18:41
Everything Shirley just said leads to corrosion. I think that may be what has flummoxed BM in the past. It wasn't poor crimping, per se, but maybe a loose crimp and it corroded. You do not have to worry about that with Marine Terminals. They are waterproof and will not corrode. If you expose them to solder then you also expose them to possibly rust. Corrosion is what really messes up the conductivity. Crimp them, put the ring on a nail, give it a really strong pull, if it doesn't come apart you are good. Shrink it and its watertight. That is how it's supposed to be done.
- Scollard
- Posts: 258
- Joined: 29 Aug 2015, 01:43
- Location: Seattle, WA
Re: S646se - Full Pack Project - First Attempt
![]() by Burgerman » 07 Apr 2016, 19:37
by Burgerman » 07 Apr 2016, 19:37
I agree that a crimp done correctly, with a terminal that has a lot of metal in it is great. But the small cheap terminals are just thin, soft, weak. The strands can move, fret, or pull out. And the crimps are not tight enough to prevent oxidation and bad high resistance connections in time. I have seen too many fall apart, fray, etc.
Once soldered nothing can get in to oxydise it.

Which is safer and less likely to pull out or Oxidise?
Once soldered nothing can get in to oxydise it.
Which is safer and less likely to pull out or Oxidise?
-
Burgerman - Site Admin
- Posts: 71087
- Joined: 27 May 2008, 21:24
- Location: United Kingdom
Re: S646se - Full Pack Project - First Attempt
![]() by Burgerman » 07 Apr 2016, 19:39
by Burgerman » 07 Apr 2016, 19:39
Crimping alone requires heavier thicker walled connectors, and a better crimper than a hand held tool if its to be any good. At least in larger sizes that we are using.

-
Burgerman - Site Admin
- Posts: 71087
- Joined: 27 May 2008, 21:24
- Location: United Kingdom
Re: S646se - Full Pack Project - First Attempt
![]() by Burgerman » 07 Apr 2016, 19:44
by Burgerman » 07 Apr 2016, 19:44
Heavy walled, no seams. Correctly crimped excludes oxygen, no oxidation and secure.
Very hard to find today.

Very hard to find today.
-
Burgerman - Site Admin
- Posts: 71087
- Joined: 27 May 2008, 21:24
- Location: United Kingdom
Re: S646se - Full Pack Project - First Attempt
![]() by Burgerman » 07 Apr 2016, 19:49
by Burgerman » 07 Apr 2016, 19:49
Most are now made from bits of soft copper tube. And zinc coated. Because its cheap. Not adequate for crimping alone - too soft. And almost always include a drilled, stamped or cut hole to add solder.

-
Burgerman - Site Admin
- Posts: 71087
- Joined: 27 May 2008, 21:24
- Location: United Kingdom
Re: S646se - Full Pack Project - First Attempt
![]() by Burgerman » 07 Apr 2016, 19:50
by Burgerman » 07 Apr 2016, 19:50
That said, its up to you!
But having worked on cars and bikes all my life, I have lost count of connectors that dont! They come apart. Worse they look fine at 3am in the rain under the car, but it wont run. Only in daylight do you find all the copper in the crimps is black and oxidised to death from the weather or salt. Soldered ones do not fail. And it only takes a second!
In small sizes, done correctly, where they will never see water crimping with hand tools is fine.
-
Burgerman - Site Admin
- Posts: 71087
- Joined: 27 May 2008, 21:24
- Location: United Kingdom
Re: S646se - Full Pack Project - First Attempt
![]() by Burgerman » 07 Apr 2016, 20:18
by Burgerman » 07 Apr 2016, 20:18
Even so, outdoors? May be pulled? This is better.

-
Burgerman - Site Admin
- Posts: 71087
- Joined: 27 May 2008, 21:24
- Location: United Kingdom
Re: S646se - Full Pack Project - First Attempt
![]() by expresso » 07 Apr 2016, 20:48
by expresso » 07 Apr 2016, 20:48
Ok i feel the Ratchet crimper i got - with a thick wire to get a good crimp - does work good - using the marine rings with 3m glue on them - then just seals the deal - done - - the only issue is if your wire is small - like the balance wires - those next time i do them will thicken the wire end once over and then crimp - they are all done now - i pulled them before and after i heatshrinked them down -
i redid the other wires since i had all the items to do it - i think they came out decent enough - i used the hydraulic crimper with some solder in there - crimped it - torched it - heatshrink it -
i did the bottom end of the pack - added the wires - how it think is best - was a good day of progress -
Quickie 636 - 230ah LifePo4
- expresso
- Posts: 11985
- Joined: 10 May 2010, 03:17
Re: S646se - Full Pack Project - First Attempt
![]() by expresso » 07 Apr 2016, 20:49
by expresso » 07 Apr 2016, 20:49
pics
Quickie 636 - 230ah LifePo4
- expresso
- Posts: 11985
- Joined: 10 May 2010, 03:17
Re: S646se - Full Pack Project - First Attempt
![]() by expresso » 07 Apr 2016, 20:50
by expresso » 07 Apr 2016, 20:50
7th row
Quickie 636 - 230ah LifePo4
- expresso
- Posts: 11985
- Joined: 10 May 2010, 03:17
Re: S646se - Full Pack Project - First Attempt
![]() by Burgerman » 07 Apr 2016, 21:18
by Burgerman » 07 Apr 2016, 21:18
All looking good. Be sure to test by charging fully. Allowing to balance on the initial charge. Then taking at least 10Ah out with the charger. And recharge. And lok at the curves BEFORE you fit it. It will show up any problems like a bad connetion or loose bolt etc.
-
Burgerman - Site Admin
- Posts: 71087
- Joined: 27 May 2008, 21:24
- Location: United Kingdom
Re: S646se - Full Pack Project - First Attempt
![]() by expresso » 07 Apr 2016, 21:23
by expresso » 07 Apr 2016, 21:23
Burgerman wrote:All looking good. Be sure to test by charging fully. Allowing to balance on the initial charge. Then taking at least 10Ah out with the charger. And recharge. And lok at the curves BEFORE you fit it. It will show up any problems like a bad connetion or loose bolt etc.
thanks - i think it does also - i am surprised how nice its starting to come together - i would be very surprised if i had a issue once all done - i am making sure of everything best i can - but hey its my first time so - and mistakes happen
i will test it the same way Scollard tested his before actually putting it in the chair - which i never test fitted but i guess its going to have to fit now -
i may have the bottom done this weekend - then wait for a friend to flip it next week - maybe Wed. - and continue on the top - will take my time - i have more wires to make - charge cable to make - a few XT90 connectors to solder -
but i am not rushing - timing is very good - if all goes well - May should be done in chair -
Quickie 636 - 230ah LifePo4
- expresso
- Posts: 11985
- Joined: 10 May 2010, 03:17
Re: S646se - Full Pack Project - First Attempt
![]() by Burgerman » 07 Apr 2016, 21:36
by Burgerman » 07 Apr 2016, 21:36
105Ah of lithium will take you as far as 150Ah of lead. At least. Plus you will save 60lb so add another 10 ot 12 percent. Same as 4 and a bit MK gels.
Add that addon, and you have the equivelent of 210Ah of lead. Or 6x MK gels! With the same weight as 1.3 of them.
That should get you far enough from home to be worried! Make sure you have an addon connector somewhere.
Add that addon, and you have the equivelent of 210Ah of lead. Or 6x MK gels! With the same weight as 1.3 of them.
That should get you far enough from home to be worried!
-
Burgerman - Site Admin
- Posts: 71087
- Joined: 27 May 2008, 21:24
- Location: United Kingdom
Re: S646se - Full Pack Project - First Attempt
![]() by expresso » 07 Apr 2016, 21:49
by expresso » 07 Apr 2016, 21:49
Burgerman wrote:105Ah of lithium will take you as far as 150Ah of lead. Plus you will save 60lb so add another 10 ot 12 percent. Same as 4 and a bit MK gels.
Add that addon, and you have the equivelent of 210Ah of lead. Or almost 6x MK gels! With the same weight as 1.3 of them.
thats pretty cool - first time i will be free not watching the joystick - battery life hopefully would be a thing of the past
i like that ADD ON - i can easily just hang it and plug it in - instant 15 miles extra - if i even need it - once i get used to my distance with it and see how far i can go - - i want to go from NYC to NJ - over the GWB - and back -
i think i can do that with the 105ah alone - but maybe i add the extra to make sure -
Doing the ADD ON First - was my practice and experience - i looked at the pictures from when i started that - early on - and then after added the 3rd row - - ran into the issues - redid it - looked ugly - redid it again - then remove BMS - and
when i compare the pictures - Before and AFter - MUCH better looking - cleaner - all the blocks snapped in correct - big difference and charging it perfect - best it can be charged - cant complain -
that experience helped me and got me ready for this pack - much more to learn as time goes for sure -
Quickie 636 - 230ah LifePo4
- expresso
- Posts: 11985
- Joined: 10 May 2010, 03:17
Return to Everything Powerchair
Who is online
Users browsing this forum: acid_coke, emilevirus, shirley_hkg, Superchunk and 105 guests