Coming along nicely.. much cleaner look. one thing to fix up is the traces on the RC headers on some of the pins mid-way down appear to be shorting the vertical +5 and GND rails through the holes
(all three pins tied together..)
Arduino controlled wheelchair
Re: Arduino controlled wheelchair
![]() by sirmike » 06 Jul 2017, 03:01
by sirmike » 06 Jul 2017, 03:01
I ordered a spare shark bus cable a little while ago on ebay hoping I could find a way to plug into the motor controller and eventually dispense with the dynamic controls joystick all together.. the challenge of course is finding a way to have the arduino board translate movements into relevant packets for the controller to understand.
I had a look at Jim Conner's github postings and that revealed a few things. https://github.com/jimconner/sharkbus
If you have a doc that describes the communications protocol between Joystick and controller that would be appreciated.
The alternative is to buy a non-proprietary motor controller and toss the Dynamic Controller for something like this..https://www.dimensionengineering.com/pr ... rtooth2x60 but it seems expensive and wasteful when there's a perfectly good controller on board already.
PS: Another good feature to have on the board would be to place a hole or two just above the header for the shark bus terminal screws. This would be used to ty-wrap the incoming cable to the board to provide for strain relief for the wires going into the screw terminals. (Never forget that it can all hard work put forth on a project can be undone by one loose connection somewhere in the works.)
What he said...
- sirmike
- Posts: 37
- Joined: 03 Jul 2017, 23:30
- Location: Victoria, BC, Canada
Re: Arduino controlled wheelchair
![]() by sirmike » 06 Jul 2017, 03:39
by sirmike » 06 Jul 2017, 03:39
Hmm. scratch 'it can' in that last sentence and it reads clearly.. (sigh, long day at work..)
What he said...
- sirmike
- Posts: 37
- Joined: 03 Jul 2017, 23:30
- Location: Victoria, BC, Canada
Re: Arduino controlled wheelchair
![]() by gcebiker » 06 Jul 2017, 04:21
by gcebiker » 06 Jul 2017, 04:21
sirmike wrote:I ordered a spare shark bus cable a little while ago on ebay hoping I could find a way to plug into the motor controller and eventually dispense with the dynamic controls joystick all together.. the challenge of course is finding a way to have the Arduino board translate movements into relevant packets for the controller to understand.
I had a look at Jim Conner's github postings and that revealed a few things. https://github.com/jimconner/sharkbus
...thats exactly what this does
Yes Jims stuff is awesome but my programming skill was 0 (or close to it) when i started, Abe also helped, he figured out how to 'bit bang the code', Jim was able to pass on the protocol which i will email to you shortly.
I have credits in the top of my code as to the contributors to the nearly finished code.
It still need's work to clean it up a bit so that the functions are in a .h file and not part of the code you might vary, eg the inputs.
With this code and others I've posted thru the thread and aslo over on the RC Arduino boat trailer project and your board, we will be practically be able plug and play.
With either a Wii Remote, Analog...which was a bit skittish as i have not averaged the inputs or RC ppm.
http://greenmobility.com.au/rc-wheelchair-controller/
My YouTube Ch -- https://www.youtube.com/user/gcebiker
My YouTube Ch -- https://www.youtube.com/user/gcebiker
-

gcebiker - Posts: 879
- Joined: 11 Jul 2015, 14:20
- Location: Gold Coast, Queensland, Australia.
Re: Arduino controlled wheelchair
![]() by gcebiker » 06 Jul 2017, 04:48
by gcebiker » 06 Jul 2017, 04:48
This is the Wii Remote version before i got the code BitMath worked out, well the guys here figured most of it out.
In the video i am mistaken as to why the code was loosing sync, it was the error checking bitmath throwing it out when the joystick value got to high/low.
https://www.youtube.com/watch?v=YVvPwSwwGj8
This video is the Wii Remote once the code was worked out (your board will replace the prototype board i am using presently)
https://youtu.be/6GkNFPJlW4c
This video is the RC ppm version driving, my house joystick wheelchair around with the new prototype board using the MAX485 chip instead of the plug in board.
https://www.youtube.com/watch?v=6x7QHqmzDK8
This video is the next one towing the boat, i had a different chair to start with but the anti tip wheels were to low and got stuck.
This chair sits on its anti tip wheels and pulls the boat nicely, will even pull the boat with me sitting in it.
1st Video of this rig - https://www.youtube.com/watch?v=Ta24wr3IecQ
2nd Vide - https://www.youtube.com/watch?v=RP0mHbw7hyU
http://greenmobility.com.au/rc-wheelchair-controller/
My YouTube Ch -- https://www.youtube.com/user/gcebiker
My YouTube Ch -- https://www.youtube.com/user/gcebiker
-
gcebiker - Posts: 879
- Joined: 11 Jul 2015, 14:20
- Location: Gold Coast, Queensland, Australia.
Re: Arduino controlled wheelchair
![]() by gcebiker » 06 Jul 2017, 04:53
by gcebiker » 06 Jul 2017, 04:53
sirmike wrote:Coming along nicely.. much cleaner look. one thing to fix up is the traces on the RC headers on some of the pins mid-way down appear to be shorting the vertical +5 and GND rails through the holes
(all three pins tied together..)
The " + " marks in the middle of the board is EAGLE's point where you move the headers, its not part of the wiring (for other people following this)
http://greenmobility.com.au/rc-wheelchair-controller/
My YouTube Ch -- https://www.youtube.com/user/gcebiker
My YouTube Ch -- https://www.youtube.com/user/gcebiker
-
gcebiker - Posts: 879
- Joined: 11 Jul 2015, 14:20
- Location: Gold Coast, Queensland, Australia.
Re: Arduino controlled wheelchair
![]() by sirmike » 06 Jul 2017, 05:31
by sirmike » 06 Jul 2017, 05:31
Of course, my layer confusion, looking at three things overlapped at once in mono-color if that isn't a classic case of lack-of-perspective I don't know what is.. same lesson can be applied in so many ways in life... things are not always as they appear.. hence the importance of communication to work things out. 
What he said...
- sirmike
- Posts: 37
- Joined: 03 Jul 2017, 23:30
- Location: Victoria, BC, Canada
Re: Arduino controlled wheelchair
![]() by gcebiker » 06 Jul 2017, 05:43
by gcebiker » 06 Jul 2017, 05:43
Mike could you run your eyes over this ?
For the most part the Ground lines and Connection to the eternal header pins are in Blue/under the board
The Red is the traces on the top , mostly + voltage lines , with one Via at the bottom for the 5v to both chips.
For the most part the Ground lines and Connection to the eternal header pins are in Blue/under the board
The Red is the traces on the top , mostly + voltage lines , with one Via at the bottom for the 5v to both chips.
http://greenmobility.com.au/rc-wheelchair-controller/
My YouTube Ch -- https://www.youtube.com/user/gcebiker
My YouTube Ch -- https://www.youtube.com/user/gcebiker
-
gcebiker - Posts: 879
- Joined: 11 Jul 2015, 14:20
- Location: Gold Coast, Queensland, Australia.
Re: Arduino controlled wheelchair
![]() by sirmike » 06 Jul 2017, 06:01
by sirmike » 06 Jul 2017, 06:01
Looking at the boat tow video.. it appears like the drive on the chair has plenty of grunt to move things around..
pretty impressive for such a compact platform. I see you're contending with the issue of backing up using a vehicle with a short wheel base.. same problem I have with my truck and a short utility trailer.. lots if responsiveness side to side.. if only there was a way to sense side-to-side position of the trailer to compensate when backing up... hmm.. sensor pack.. led lighting, and more code might be worth a look into in the fall once the basics are squared away..
Nice boat BTW!
Do optional stability wheels at the back of the scooter help or hinder towing on an uneven surface?
My Jazzy comes with six wheels for anti-tip functionality.)
What he said...
- sirmike
- Posts: 37
- Joined: 03 Jul 2017, 23:30
- Location: Victoria, BC, Canada
Re: Arduino controlled wheelchair
![]() by sirmike » 06 Jul 2017, 07:16
by sirmike » 06 Jul 2017, 07:16
OK, looking over the board I see a number of changes...
Where you were using nano pins D3,D9,D10,D12 you now have..
J1-5 - D2 -> 6 INPUT on switch IC
J1-9 - D6 -> 1 of Max485
J1-10 - D7 -> 2,3 of Max485
J1-12 - D9 -> 4 of Max485
so I assume pin definition changes in the sketch to match up with the new data pins being used.
D1, D2 labels on the silk screen have flipped from the names called out on the schematic.. no biggie.
What appears to me as a mistake.. is the traces into Pin 6 and 7 of the Max485 are flipped.. 6 (A) should go to Pin 2 of the switch IC, and 7 (B) should go to the B screw terminal on the shark bus connector.
In the schematic I had the clamping diode between switch IC pins - Anode to pin 8 and cathode to pin 5, but I also thought the cathode connected to +24v as well..
correct me if this is not the case..
Finally, as a good practice measure I'd also recommend finding a way to tie the two GNDs on the nano together (J1-4 to J2-2) so the pin is not floating.
Thats it./
What he said...
- sirmike
- Posts: 37
- Joined: 03 Jul 2017, 23:30
- Location: Victoria, BC, Canada
Re: Arduino controlled wheelchair
![]() by gcebiker » 06 Jul 2017, 09:03
by gcebiker » 06 Jul 2017, 09:03
Do optional stability wheels at the back of the scooter help or hinder towing on an uneven surface?
My Jazzy comes with six wheels for anti-tip functionality.)
My Jazzy 600 (where the Power Module came from) and my present Q6 Edge both have 6 wheels but that silver donor chair seems to do ok and with no load on the front wheels its easier to turn. Plus it was free...and fits under the boat and the captain seat that was on it. I have put on my Q6 Edge...is SOOO comfortable over foam/gel cushions i have been using for years.
That was my first go ever backing that trailer with that power base and i have tweaked the Power base code and that of the RC Transmitter since then, to make it much more controllable, as to sensors, yes i have ultrasonic sensors here and have a sketch here to use them but the timing was never quite right so i had planned to use a separate Nano for the purpose of measuring the distance / add a Lidar, SEEED now has some affordable ones.
Where you were using nano pins D3,D9,D10,D12 you now have..
J1-5 - D2 -> 6 INPUT on switch IC
J1-9 - D6 -> 1 of Max485
J1-10 - D7 -> 2,3 of Max485
J1-12 - D9 -> 4 of Max485
so I assume pin definition changes in the sketch to match up with the new data pins being used.
Its to free up the SS, MISO, MOSI pins for anyone wanting to use them or us for interfacing with our sensors.Yes i will be changing the sketch to reflect the pin changes.
What appears to me as a mistake.. is the traces into Pin 6 and 7 of the Max485 are flipped.. 6 (A) should go to Pin 2 of the switch IC, and 7 (B) should go to the B screw terminal on the shark bus connector.
That IC you are looking at is the Maxim - MAX485. A and B being the outputs
The other one is the Maxim DG419 , it has to be a MAXIM brand, others though cheaper. WILL NOT run at power chair voltages.
That was a mistake i just found, but in my schematic.
Instead of going from memory this time i had the working board in front of me.
I have yet to include the small Cap on the DG419, the spec sheet does not call for it but as soon as i figure out how to add a part i will be putting it in.
http://greenmobility.com.au/rc-wheelchair-controller/
My YouTube Ch -- https://www.youtube.com/user/gcebiker
My YouTube Ch -- https://www.youtube.com/user/gcebiker
-
gcebiker - Posts: 879
- Joined: 11 Jul 2015, 14:20
- Location: Gold Coast, Queensland, Australia.
Re: Arduino controlled wheelchair
![]() by sirmike » 06 Jul 2017, 13:01
by sirmike » 06 Jul 2017, 13:01
Never miss the opportunity to add a bypass capacitor to smooth out the power.. on either the 24v or the 5v rail..
it's good insurance against transients.
Two tips on using Eagle CAD..
To add a new component: Edit -> Add -> 'Enter device type and pick from list'
Knowing what they call a part in the library can sometimes be a challenge.
To add 45 degree bends in traces.. pick Draw -> Line -> ' Pick your wire bend style from the selection strip along the upper left of the screen..
- picker.JPG (11.08 KiB) Viewed 15633 times
What he said...
- sirmike
- Posts: 37
- Joined: 03 Jul 2017, 23:30
- Location: Victoria, BC, Canada
Re: Arduino controlled wheelchair
![]() by gcebiker » 06 Jul 2017, 13:08
by gcebiker » 06 Jul 2017, 13:08
Hi Mike,
Things i get stuck,
- The pins for the inputs are overlapping, the reason for most of the errors when i do the wiring check.
- I cant seem to figure out how to edit the text.
I dont know how to assign values to the caps.
C1 is just a tiny .1uf ceramic filter cap (well thats what i think it is, it might say 104M , ill pull the packet out and see in the morning what they are)
C2 is an Electrolytic 105deg, 1000uf, 6.3v
R1 - 22k metal film (value is important not the type)
R2 - 1K 1W resistor.
D1 - 1N4148 in DO-35 glass axial package (sorry i got these wrong when you asked previously)
D2 - 1N4148 in DO-35 glass axial package
IC3 - 5W TSR 1-2450 - TracoPower voltage regulator. - (7805 is rated 24-5v 1amp but they burn up fast...)
IC1 - Maxim DG419 - PDF spec sheet here...
IC2 - Maxim MAX485 - RS485 Tranciever PDF spec sheet here...
The Arduino that processes the input into Serial data via Software Serial to the MAX485
Arduino Nano V3.0 by Gravitech http://www.gravitech.us/arna30wiatp.html
EAGLE cad files (only just found this)
Picture of physical board - it might require tweaking, Mike are you able to add the mounting holes and strain relief for the SHARK BUS cable ?
EAGLE file for the above - cant upload it, Mike i will email it to you. (Ive windows 10 64 now and i remember renaming files in the past)
http://greenmobility.com.au/rc-wheelchair-controller/
My YouTube Ch -- https://www.youtube.com/user/gcebiker
My YouTube Ch -- https://www.youtube.com/user/gcebiker
-
gcebiker - Posts: 879
- Joined: 11 Jul 2015, 14:20
- Location: Gold Coast, Queensland, Australia.
Re: Arduino controlled wheelchair
![]() by sirmike » 06 Jul 2017, 13:34
by sirmike » 06 Jul 2017, 13:34
Ok signal diodes instead of power rectifiers makes sense I have both laying around.
Text editing is usually a matter of context.. selecting the correct layer before trying to edit.. tName is a good one..
Mounting holes, sure I'll add them.
Text editing is usually a matter of context.. selecting the correct layer before trying to edit.. tName is a good one..
Mounting holes, sure I'll add them.
What he said...
- sirmike
- Posts: 37
- Joined: 03 Jul 2017, 23:30
- Location: Victoria, BC, Canada
Re: Arduino controlled wheelchair
![]() by gcebiker » 06 Jul 2017, 14:33
by gcebiker » 06 Jul 2017, 14:33
Arduino Sketch that should work with the board Ver 1.6 (my previous post)
 SR_RC_PCB_Board_July_6_2017.zip
- (4.79 KiB) Downloaded 425 times
http://greenmobility.com.au/rc-wheelchair-controller/
My YouTube Ch -- https://www.youtube.com/user/gcebiker
My YouTube Ch -- https://www.youtube.com/user/gcebiker
-
gcebiker - Posts: 879
- Joined: 11 Jul 2015, 14:20
- Location: Gold Coast, Queensland, Australia.
Re: Arduino controlled wheelchair
![]() by gcebiker » 07 Jul 2017, 01:07
by gcebiker » 07 Jul 2017, 01:07
Mike i have replaced the 3pin, header pins on the left and right of the Arduino Female Header.
Trying to find/fix the DRC errors.
Still working on it, ill post and email the file when it passes the DRC check and any other checks i need to do.
Trying to find/fix the DRC errors.
Still working on it, ill post and email the file when it passes the DRC check and any other checks i need to do.
http://greenmobility.com.au/rc-wheelchair-controller/
My YouTube Ch -- https://www.youtube.com/user/gcebiker
My YouTube Ch -- https://www.youtube.com/user/gcebiker
-
gcebiker - Posts: 879
- Joined: 11 Jul 2015, 14:20
- Location: Gold Coast, Queensland, Australia.
Re: Arduino controlled wheelchair
![]() by sirmike » 07 Jul 2017, 07:25
by sirmike » 07 Jul 2017, 07:25
ok, I ran out of time this evening to finish things up but I got a good start.. will have more time on the weekend to get things
ready for a board run.
ready for a board run.
What he said...
- sirmike
- Posts: 37
- Joined: 03 Jul 2017, 23:30
- Location: Victoria, BC, Canada
Re: Arduino controlled wheelchair
![]() by gcebiker » 07 Jul 2017, 07:46
by gcebiker » 07 Jul 2017, 07:46
Ive gone through and put labels on stuff, i have not connected the schematic yet, i think i need to do that for some of the DRC errors to go away.
This is Version 1.8,
i am starting V1.9 now, i think all i have to do is reconnect the header pins on the side to the arduino.
Mike should i stop now so that you dont have to redo anything ?
God knows this stuff is time consuming (well it is for noobs )
This is Version 1.8,
- Arduino_Shark_v1.8.zip
- (12.04 KiB) Downloaded 413 times
i am starting V1.9 now, i think all i have to do is reconnect the header pins on the side to the arduino.
Mike should i stop now so that you dont have to redo anything ?
God knows this stuff is time consuming (well it is for noobs )
http://greenmobility.com.au/rc-wheelchair-controller/
My YouTube Ch -- https://www.youtube.com/user/gcebiker
My YouTube Ch -- https://www.youtube.com/user/gcebiker
-
gcebiker - Posts: 879
- Joined: 11 Jul 2015, 14:20
- Location: Gold Coast, Queensland, Australia.
Re: Arduino controlled wheelchair
![]() by gcebiker » 07 Jul 2017, 08:11
by gcebiker » 07 Jul 2017, 08:11
I think this is the finished board... 
Found some things i could improve over the last one.
Bugger, its still called 1.7 but its really 1.9
I know it looks like Pin 8 of the MAX485 is touching the B output but in the EAGLE file its not.
Should i be connecting all the pads underneath with Via's over the place to make it over any crossover tracks ?
- Arduino_Shark_v1.9.zip
- (12.68 KiB) Downloaded 406 times
Found some things i could improve over the last one.
Bugger, its still called 1.7 but its really 1.9
I know it looks like Pin 8 of the MAX485 is touching the B output but in the EAGLE file its not.
Should i be connecting all the pads underneath with Via's over the place to make it over any crossover tracks ?
http://greenmobility.com.au/rc-wheelchair-controller/
My YouTube Ch -- https://www.youtube.com/user/gcebiker
My YouTube Ch -- https://www.youtube.com/user/gcebiker
-
gcebiker - Posts: 879
- Joined: 11 Jul 2015, 14:20
- Location: Gold Coast, Queensland, Australia.
Re: Arduino controlled wheelchair
![]() by gcebiker » 07 Jul 2017, 14:45
by gcebiker » 07 Jul 2017, 14:45
There are 2 Via's i have found that i am having a bit of trouble removing.
They are not needed, its a mistake i made this morning when i was trying to get a trace to go where i wanted.
The one inside the DG419 chip
The one inside the Ceramic Cap, C1
They are not needed, its a mistake i made this morning when i was trying to get a trace to go where i wanted.
The one inside the DG419 chip
The one inside the Ceramic Cap, C1
http://greenmobility.com.au/rc-wheelchair-controller/
My YouTube Ch -- https://www.youtube.com/user/gcebiker
My YouTube Ch -- https://www.youtube.com/user/gcebiker
-
gcebiker - Posts: 879
- Joined: 11 Jul 2015, 14:20
- Location: Gold Coast, Queensland, Australia.
Re: Arduino controlled wheelchair
![]() by gcebiker » 07 Jul 2017, 14:59
by gcebiker » 07 Jul 2017, 14:59
Mike, this as far as i have gotten with the .sch file ...its midnight so i guess i should get some sleep.
I wont be able to work on it till late tomorrow night so feel free to beat me to it
I wont be able to work on it till late tomorrow night so feel free to beat me to it
- Arduino_Shark13.zip
- (7.92 KiB) Downloaded 412 times
http://greenmobility.com.au/rc-wheelchair-controller/
My YouTube Ch -- https://www.youtube.com/user/gcebiker
My YouTube Ch -- https://www.youtube.com/user/gcebiker
-
gcebiker - Posts: 879
- Joined: 11 Jul 2015, 14:20
- Location: Gold Coast, Queensland, Australia.
Re: Arduino controlled wheelchair
![]() by gcebiker » 08 Jul 2017, 06:40
by gcebiker » 08 Jul 2017, 06:40
Its not quite right with respect to the models used from the EAGLE library.
Some of the pins in the EAGLE lib are different to the chip actually used.
Pic of the board V1.9(despite my forgetting to change the notes at the bottom)
BRD for EAGLE - 3 max per post but its only a few posts before this.
Pic of the Schematic
SCH file for EAGLE
If anyone sees something wrong please let me know.
I dont know that i can merge the two.
I am going to try importing the library from Maxim if i can find them.
Some of the pins in the EAGLE lib are different to the chip actually used.
Pic of the board V1.9(despite my forgetting to change the notes at the bottom)
BRD for EAGLE - 3 max per post but its only a few posts before this.
Pic of the Schematic
SCH file for EAGLE
- Arduino Shark SCH v1.3.zip
- (8.73 KiB) Downloaded 395 times
If anyone sees something wrong please let me know.
I dont know that i can merge the two.
I am going to try importing the library from Maxim if i can find them.
http://greenmobility.com.au/rc-wheelchair-controller/
My YouTube Ch -- https://www.youtube.com/user/gcebiker
My YouTube Ch -- https://www.youtube.com/user/gcebiker
-
gcebiker - Posts: 879
- Joined: 11 Jul 2015, 14:20
- Location: Gold Coast, Queensland, Australia.
Re: Arduino controlled wheelchair
![]() by gcebiker » 08 Jul 2017, 06:54
by gcebiker » 08 Jul 2017, 06:54
I was to slow to edit that post, so here is an amended schematic with better labeling.
SCH file, which probably wont work as the MAX485 chip does not have enough pin outs in the model. Looking into fixing that now.
Only provided in case Mike starts looking at it today/tonight...time zones hey
SCH file, which probably wont work as the MAX485 chip does not have enough pin outs in the model. Looking into fixing that now.
Only provided in case Mike starts looking at it today/tonight...time zones hey
- Arduino Shark SCH v1.3.zip
- (8.73 KiB) Downloaded 371 times
http://greenmobility.com.au/rc-wheelchair-controller/
My YouTube Ch -- https://www.youtube.com/user/gcebiker
My YouTube Ch -- https://www.youtube.com/user/gcebiker
-
gcebiker - Posts: 879
- Joined: 11 Jul 2015, 14:20
- Location: Gold Coast, Queensland, Australia.
Re: Arduino controlled wheelchair
![]() by gcebiker » 08 Jul 2017, 08:39
by gcebiker » 08 Jul 2017, 08:39
Ok i think this is spot on...but you never know, only been doing this for 2 days, not like i have much experience with this program...
That said, V1.9 with corrected models and pin connections (mistake not critical)
EAGLE sch file v1.9
That said, V1.9 with corrected models and pin connections (mistake not critical)
EAGLE sch file v1.9
- Arduino Shark SCH v1.9.zip
- (9.04 KiB) Downloaded 384 times
http://greenmobility.com.au/rc-wheelchair-controller/
My YouTube Ch -- https://www.youtube.com/user/gcebiker
My YouTube Ch -- https://www.youtube.com/user/gcebiker
-
gcebiker - Posts: 879
- Joined: 11 Jul 2015, 14:20
- Location: Gold Coast, Queensland, Australia.
Re: Arduino controlled wheelchair
![]() by gcebiker » 08 Jul 2017, 13:35
by gcebiker » 08 Jul 2017, 13:35
Parts list
Part Value Package Library Position (mil) Orientation
C1 0.1uF C050-024X044 rcl (1500 950) R0
C2 6.3v 1000uf Electrolytic C050-024X044 rcl (2050 2000) R0
D1 Signal Diode DO41-7 diode (1500 1950) R270
D2 Signal Diode DO41-7 diode (1450 1600) R180
E$1 Female Header TSW-115-02-S-T con-samtec (2100 900) R90
E$2 Female Header TSW-115-02-S-T con-samtec (800 900) R90
E$7 Arduino Nano V3.0
H3 Screw Terminal 4pin W237-4P con-wago-508 (1000 2350) R0
IC1 DG419 DIL08 maxim (1450 1250) R0
IC2 MAX485 DIL08 maxim (1450 650) R270
IC3 7805TV TO220V linear (1950 2450) R0
R1 22K R-7,5 discrete (800 1950) R0
R2 1K 1W 0207/10 resistor (1300 1900) R90
http://greenmobility.com.au/rc-wheelchair-controller/
My YouTube Ch -- https://www.youtube.com/user/gcebiker
My YouTube Ch -- https://www.youtube.com/user/gcebiker
-
gcebiker - Posts: 879
- Joined: 11 Jul 2015, 14:20
- Location: Gold Coast, Queensland, Australia.
Re: Arduino controlled wheelchair
![]() by gcebiker » 08 Jul 2017, 15:18
by gcebiker » 08 Jul 2017, 15:18
I have emailed two Australian Companies for quotes to make the board on what i have so far.
I cant join the board as in the SCH i can import the model for the MAX485, i am unable to import it into the BRD file "not compatible" it says
So i can get an idea of how many to order, can people following this thread post that they would want one.
Thanks
Tony
I cant join the board as in the SCH i can import the model for the MAX485, i am unable to import it into the BRD file "not compatible" it says
So i can get an idea of how many to order, can people following this thread post that they would want one.
Thanks
Tony
http://greenmobility.com.au/rc-wheelchair-controller/
My YouTube Ch -- https://www.youtube.com/user/gcebiker
My YouTube Ch -- https://www.youtube.com/user/gcebiker
-
gcebiker - Posts: 879
- Joined: 11 Jul 2015, 14:20
- Location: Gold Coast, Queensland, Australia.
Re: Arduino controlled wheelchair
![]() by sirmike » 08 Jul 2017, 18:19
by sirmike » 08 Jul 2017, 18:19
So, I sat down last night to look at the board and add mounting, strain relief holes, and board outlines..
and the question came up what dimension should the board be.. so I looked at Dirty PCB website and can see
that their cheap protoboard service gives ~10 boards in 5x5cm or 10x10cm sizes for <=$20USD... (not bad.)
Then, I looked at custom sizes within the 10x10cm size range and the cost appears to be the same..
Then, I got to thinking about future uses for an autonomous Jazzy platform..
and came to the conclusion that the nano itself is ok for the interface to the chair and do RC, but what if you wanted
to provide for more sensors and processing capability in the future, wouldn't a PI HAT board with a bit of proto space
be a thing to consider..
Then, I looked for PI HAT Eagle CAD board template an found a couple.. 56.5mm x 65 or 85mm with the outline,
PI GPIO header, mounting holes already defined.. all fits within the 10x10cm $20/10 boards scenario.
So, now the question to you..
what do you think about incorporating the Arduino Shark board layout into a Pi HAT format?
Kill two birds with one stone..
The updated board could be used standalone, as originally intended, or populated with a Traco 2Amp part
and a RPi GPIO Header to run both NANO and the PI from the + 24v power supplied by the chair?
Something like.. these merged together..?
What he said...
- sirmike
- Posts: 37
- Joined: 03 Jul 2017, 23:30
- Location: Victoria, BC, Canada
Re: Arduino controlled wheelchair
![]() by gcebiker » 09 Jul 2017, 02:05
by gcebiker » 09 Jul 2017, 02:05
- Code: Select all
what if you wanted
to provide for more sensors and processing capability in the future
Love the idea, nice cases for the Pi too, solves that problem for the Arduino.
With a case like this we could even incorporate a OLED screen...

I know next to nothing about Raspberry Pi but will put some time into it today.
Do you mean the Arduino plugs into a Raspberry Pi with that board you found ?
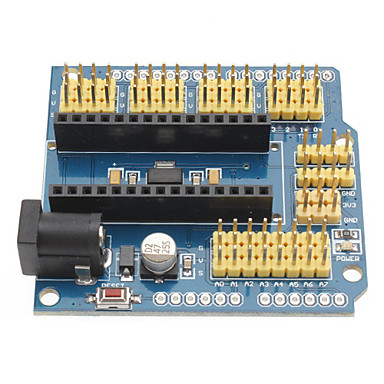
I was aiming for something like this for the Arduino.
Does your idea skip that step and go right to the next phase for the extra processing power needed to keep the timing right and process sensor data?
While keeping it simple / cheap for the people that just want the basics ?
Seems win win to me.
What can i do to help ?
http://greenmobility.com.au/rc-wheelchair-controller/
My YouTube Ch -- https://www.youtube.com/user/gcebiker
My YouTube Ch -- https://www.youtube.com/user/gcebiker
-
gcebiker - Posts: 879
- Joined: 11 Jul 2015, 14:20
- Location: Gold Coast, Queensland, Australia.
Re: Arduino controlled wheelchair
![]() by gcebiker » 09 Jul 2017, 03:58
by gcebiker » 09 Jul 2017, 03:58
Cool, the Pi can be programed with C++ which is pretty close to the Arduino code , nice !
Ive already a bunch of Ultra Sonic senors .
What type of Pi should i order Mike ?
It will take a while to get here so i am planning ahead.
Ive already a bunch of Ultra Sonic senors .
What type of Pi should i order Mike ?
It will take a while to get here so i am planning ahead.
http://greenmobility.com.au/rc-wheelchair-controller/
My YouTube Ch -- https://www.youtube.com/user/gcebiker
My YouTube Ch -- https://www.youtube.com/user/gcebiker
-
gcebiker - Posts: 879
- Joined: 11 Jul 2015, 14:20
- Location: Gold Coast, Queensland, Australia.
Re: Arduino controlled wheelchair
![]() by sirmike » 09 Jul 2017, 04:22
by sirmike » 09 Jul 2017, 04:22
Yes the HAT concept is an expansion board for the Pi.. several regular arduino hats exist.. they're a dime a dozen on the web..
just not one with the shark bus drivers ICs/logic/firmware combination.. so that's what we could put on the table.
RPis have several I/O pins like the Arduino, but with an integrated linux platform/desktop.. 1GB of RAM and lots of compute power
in comparison to the nano. They can be taught to play together via RX/TX pins, I2C, data pins.. or via USB adapters depending on the interest.
The recommended supply for the latest RPi is 2A@5V, but in practice they draw <.5A with a GPS dongle attached.
When you load them up with peripherals they start need more current. The nano I've got seems to draw <0.05A
so at 0.55A draw - we could get away with the 2A version of the Traco converter with the same regulator pinout.
I see that the 3A version of the Traco is a big bigger package and it is a 5 pin beastie. (I'll see if we can accommodate the
pads for both options,to really future proof for lots of sensors drawing power.. but if not, 2A will do the trick for now.
One hurdle to overcome is that - while RPi are powered by 5v supplies - their logic is 3.3v (on board 3.3v regulator).
At the very least, interfacing data pins between the two devices requires two resistors 1k/2k to divide the logic voltage from nano to PI. This is not a big deal
to accommodate with some proto space on the board. (There are other fancier options, but they're not really required.)
The HAT displaces the need for an Arduino shield as it can perform double duty. Running stand alone, or plugging onto the RPi
to integrate the two platforms.
The catch is more programming required to benefit from the RPi capabilities, the payoff is more future options, and a wider audience
to develop add-ons to the whole concept.
Doing a nano-shark-HAT I'd be interested in 4 boards to start with, as then, I could try out a few different RPI interface concepts and
plug them/swap them/ onto the Jazzy platform at will.
I'll start in on the HAT layout using the latest rev of the board file you've got to this point, then forward it along for you to look over.
What he said...
- sirmike
- Posts: 37
- Joined: 03 Jul 2017, 23:30
- Location: Victoria, BC, Canada
Return to Everything Powerchair
Who is online
Users browsing this forum: Burgerman, Kande_ian, ricardoh, yeshelp and 73 guests