|
WheelchairDriver |
|
||
 |
| ||
|
WheelchairDriver |
|
||
|
|
| ||
|
|
DETAILS Now, I fly model aircraft, Helicopters etc so this stuff is all obvious to me, but it may not be to you. So I will break down what you need, what I used and why, as we go through these photos. This may also help new FPV or Quad copter users that are NOT disabled...
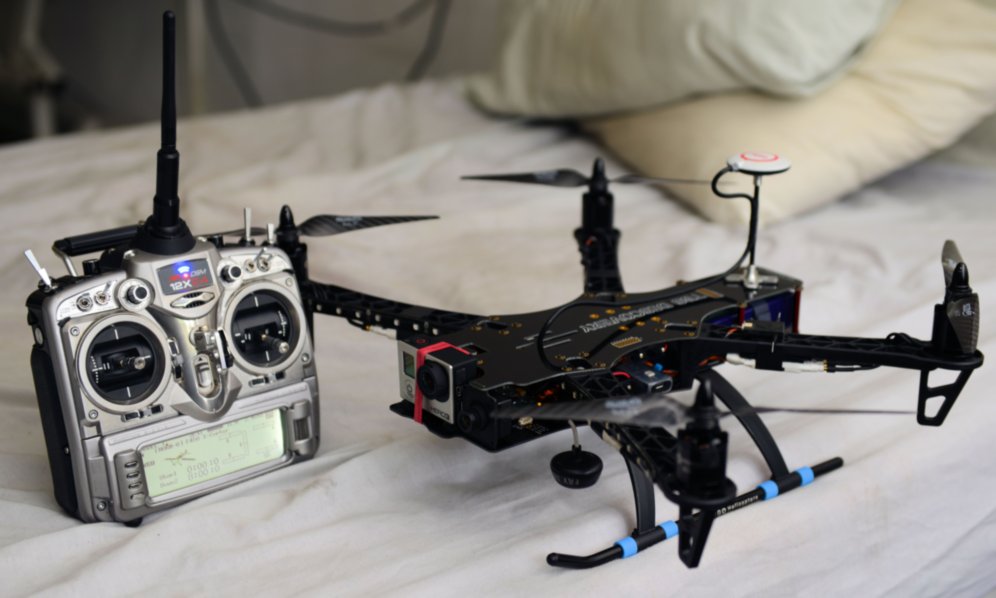
Shown here: My RC transmitter. Is BOOSTED so its got 4x the range Here!!! You don't need to spend this much. This is a bit fancy! Because I use this thing to drive powerchairs about, as well as helicopters, camera platforms such as the one here, and so on. So its worth spending the extra in my case. This is a modern 2.4ghz and US spec with 200ma radio output. The UK spec legal 2.4ghz ones, used to be 10ma, and were later increased to 100ma. The thing about FPV (First Person View) flying, is that you can fly a LONG way away! So maximum range really matters here. 200mw US spec transmitters are not actually "legal" in the UK which makes do (now) with 100mw. This used to be just 10mw. This may be just a 3db difference, but every bit helps! Don't let this small difference worry you too much though. Any 6 channel radio control transmitter is fine. And also I have the TBS Discovery "frame". (Chassis - From Team Black Sheep) There are many quad (and hex or octo) copters available but this one is great for the Go Pro cameras. Its design keeps the propellers out of the picture. As if you are sat on the nose of a plane. So its worth the extra cost over some cheaper X designs and these are available in most countries from various vendors or direct from Black Sheep in the USA. The UNDERCARRIAGE is not normally fitted. It is from a LOGO 600 model helicopter. It is attached only by double sided tape, and very solid. Most people don't have this. But I cannot reach it on the ground unless it has this! I am a wheelchair user. Its not heavy. So has marginal affect on the 10 to 12 minute flight times. It also allows the Antenna for the video goggle to be sited on the bottom (that umbrella thingy!) giving better performance. The CONTROLLER is a Naza M unit. Also available from countless places. This is an autopilot, GPS module (the white thing on the mast on top at the rear) connected. It effectively flies the aircraft and makes it super stable, fixes it in space, and flies it home if there's any need to the point it took off from. Technology has got out of control! It can also do 30 or 40 MPH and hover for about 18 minutes per battery, max, if you run it until there's nothing left. |
|
COMPONENTS
I use the following...
|
DETAIL
These two boards at the top are the tiny transmitters that send the VIDEO signal back to your goggles. You only need one. Top left is the 250mW output Fat Shark one, and antenna included with the goggles. It works, but lacks range. Top right is the ImmersionRC 600mW one, and this is LOTS better with a much greater range and signal strength. It also has a wider voltage input range, meaning it can run directly from the 4 cell flight battery. No regulator needed. It also has the BETTER antenna fitted than the stock Fat Shark "free" one. This makes a massive difference.. You NEED one of these, and those SpiroNET antennas. See list above! .The black blurred thing at the bottom is the tiny Sony FPV camera. Again see list. Not cheap.
900KV Team Black Sheep motors. MUCH better than the 750kV motors, when used with the 9 x 5 propellers that are essential. 8 inch, lacks power. 10 inch is seen in the cameras view, and causes JELLO cam wobbly picture issues... The vibration frequency is just where the camera doesn't like it. So these are the best match. RC Timer or Graupner 9 x 5 or RC Timer carbon props, 900kV motors. Even so, the motor and prop must be balanced to an extremely fine level to get the sharpest cleanest camera output. It takes me 4 hours to balance a new set of props ON the quad-copter, running one motor at a time. You will be amazed how accurately I have to do this. If you want to know how, join my forum and ask! The result is SMOOTH sharp JELLO FREE video. see shapes-1080.mp4
USB port for setup, switch for radio control & NAZA M & GPS on/off. And switch for FPV camera power on/off.
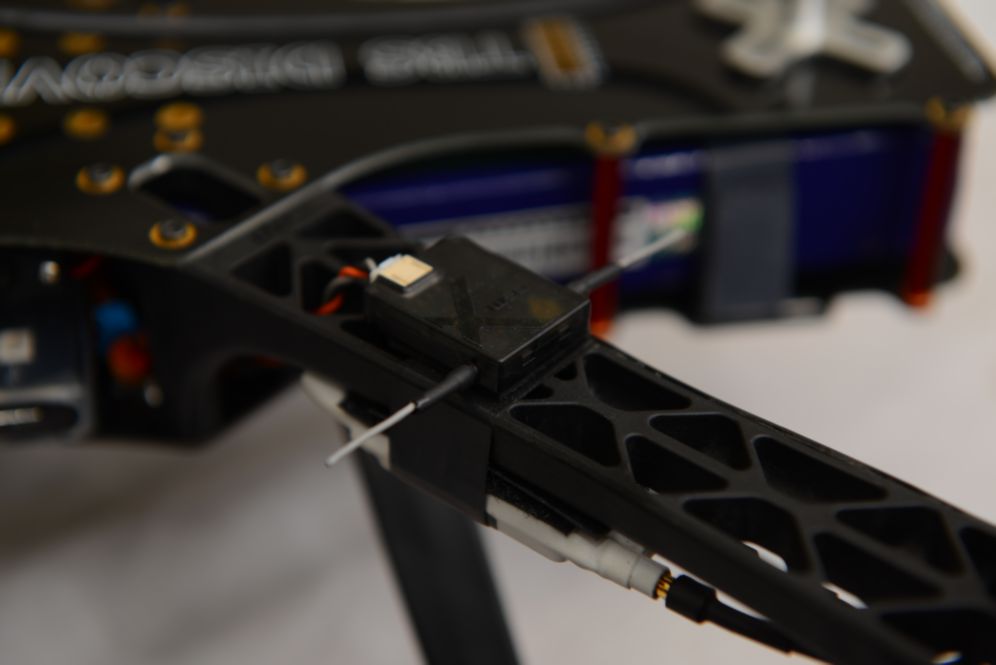
One of the separate satellite receivers. Be sure the two short wire antennas are away from any frame materials, and in open air. In fact only one of these is the antenna. The other is the ground plane. So the one on the right here is the important one!
And located as far apart as practical. Here the lower wire in the actual antenna.
GoPro HERO3 and the FPV camera side by side. One records broadcast quality HD movies, the other sends a signal back to your goggles...
The three FPV components. Camera Transmitter, and goggles...
The best place for the FPV antenna is the bottom! 5.8ghz signals are blocked easily by the copter. So sited above causes some issues. |
|
EXAMPLE VIDEOS NOT MINE... http://www.youtube.com/watch?v=ghDXBIy_BSM&list=PL25430E4A6319DE17&index=2 http://www.youtube.com/watch?v=bCTFJOkFOq4&list=PL25430E4A6319DE17 http://www.youtube.com/watch?v=ESYr2y-WOeE&list=PL25430E4A6319DE17
|
|
Content, Images, Software & Design (c) Burgerman 1996 & aggressively protected by whatever means needed -- Message Board |
![]()