|
WheelchairDriver |
|
||
 |
| ||
|
WheelchairDriver |
|
||
|
|
| ||
|
|
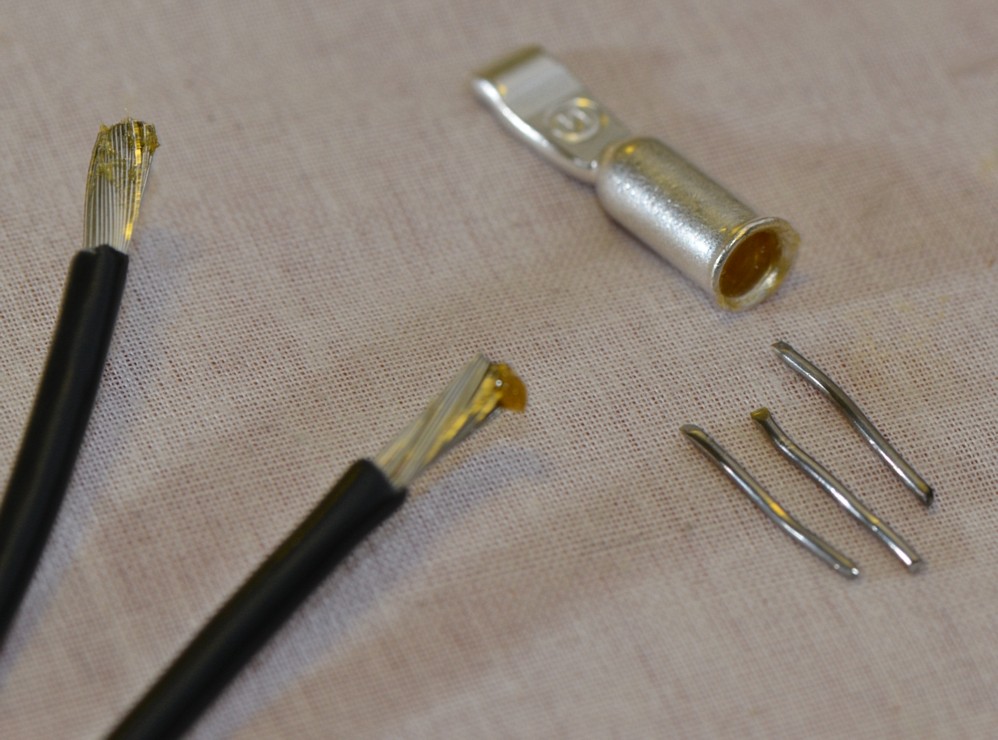
STRIP CABLE! For powerchair or any outdoor or vehicle job always use MARINE STRANDED TINNED cable. Mine came from eBay. It has thin hard tough insulation, many strands, low resistance, and is tinned already giving corrosion resistance and making soldering very easy. This cable here is 6 sq mm cross section, and small compared to some. Its actually for my new solar panel installation. The connectors are Anderson, 50 Amp, as used on many things. First cut cable end SQUARE with sharp side cutters. Use a sharp blade to make a thin careful cut around the insulation, and do not go all the way through. The idea is just to weaken it. You want exactly the same amount of insulation removed as the depth of the connector. Don't be sloppy here or it will leave bare cable showing, or the inner will not go fully into the connection.
Correctly stripped with the rusty old side cutters... Note the Anderson connector things in the background. Note: these are already tinned by the manufacturer, making for very easy soldering. ADD FLUX
Add some NON ACID electrical flux. If it looks like ear way that is the stuff! DON'T USE MUCH!!! Add a small amount to the connector and again to the cable. The solder flows freely wherever there is a coating of flux. So do not get any on the outside! Solder will follow the flux.
Cut 3 small strips of rosin cored solder about 3mm longer than the connector. These will be crimped into the connector with the cable...
Assemble with solder evenly spaced. NOT as shown above if you can! This is a nice push fit. CRIMP!!!
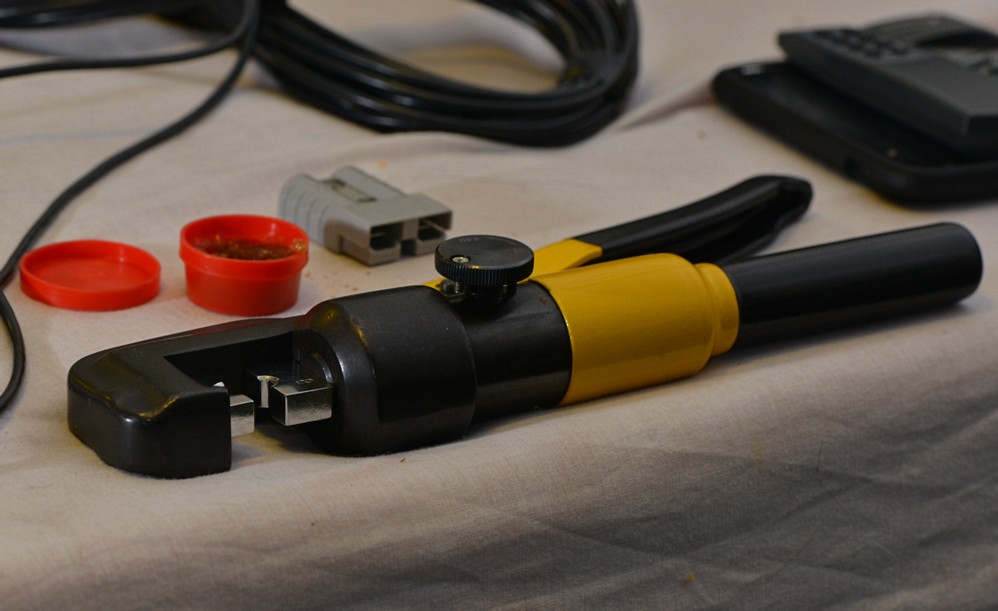
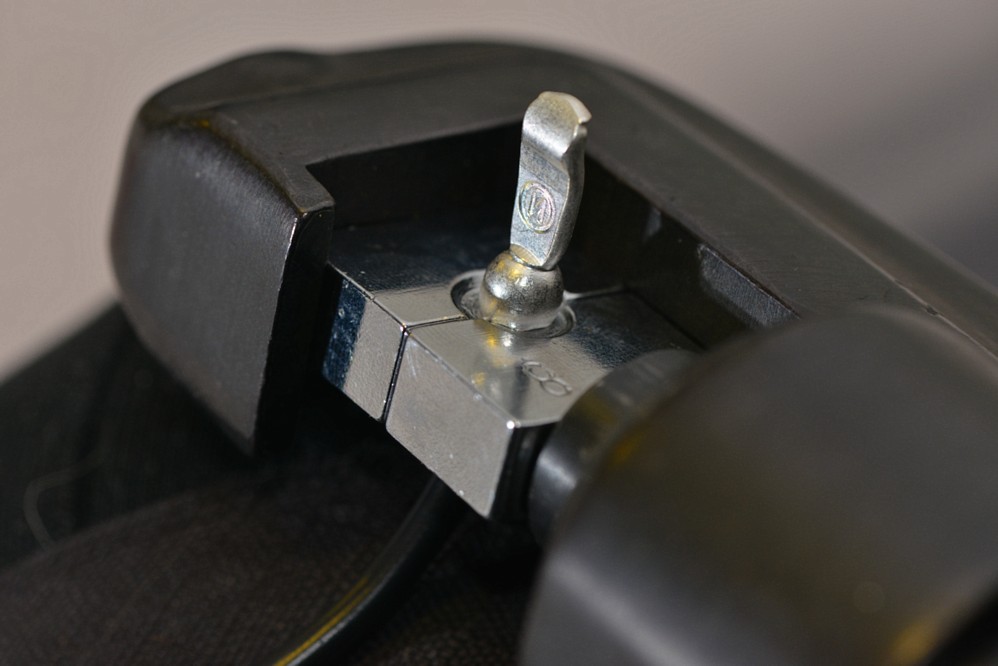
Don't use a vice, pliers, cheap tool, buy a proper hydraulic crimp tool on eBay for the price of 1 round of drinks. You need this, and it will last forever. Then use the correct sized jaws. On 6mm cable, in these connectors I use an 8 and a 10 together. Because there is no 9! Experiment carefully.
Crimp gently about 80 percent, then turn 90 degrees, and complete to 100 percent. This does a neat job without "ears"...
The crimped result is neat, and very tight and likely good enough for indoor use or non critical stuff as it is. But... I have seen crimps fail, get corroded, or fray at the point where the cable exits. And if you pull hard it can come apart... Which is why we added flux and solder when we assembled it. The excess solder you see here will be absorbed into the joint, leaving a shiny ring of solder just visible later on. HEAT
So using a small cheap pencil flame torch we just heat it for 4 to 6 seconds, until the solder we left sticking out melts. This excess solder is drawn into the joint by capillary action, and is aided vastly by the extra flux we added earlier. The flux boils, and coats every strand, the solder follows it. As soon as the solder melts, heat for just 1.5 seconds more, then abruptly STOP. And then dip into water (or your coffee) fast... This is to cool it before the heat soaks into the cable insulation and melts it. I used my beer... (DON'T heat the solder, or the cable, just the middle of the joint away from the wire for a few seconds only.)
After you finish it will look like this. If you put that into a vice, and get two men to swing on it, it is just not coming off! The cable will snap first. It will not corrode, either as the solder filled all voids and air spaces. The joint is solid and contains no voids. ASSEMBLE
Assembled with the connecters snapped into the Anderson 50 shell. If you don't do it this crimping and soldering thing neatly, these connectors will not correctly fit the shell and the connection will not be reliable... Hope that helped a few people!
Forum thread here: http://www.wheelchairdriver.com/board/viewtopic.php?f=2&t=2749&p=35938#p35938 |
|
|
|
Content, Images, Software & Design (c) Burgerman 1996 & aggressively protected by whatever means needed -- Message Board |
![]()